Welcome to my blog!

Thanks so much for stopping by! I believe that everyone can have a beautiful home without spending a fortune! One of my favorite things to do is find creative ways to re-purpose things I already have on hand, or have picked up at yard sales and thrift stores. Join me as I share with you some of my favorite ideas for crafting and decorating, as well as travel adventures, and fun things that I pick up on my treasure hunts! Much of my work is influenced by my love all things French, nature, and of course shabby chic! I have gotten so many creative ideas from you very talented bloggers out there, and I hope that I can be an inspiration to you as well!

Thursday, September 17, 2015

Fun Fall Wreath Project

With temps still in the 80's, and the calendar saying it's still summer, it seems a bit strange to think of fall.
While I don't look forward to less day light, I do long for cooler days, crisp nights, and the beginning of nesting season!
So today I thought I'd share with you my latest fall inspired creation, which I completed for DecoArt.
This challenge required creating outdoor fall decor.  With no other stipulations (other than to use DecoArt products, of course), what to do?
So I headed on over to Pinterest for some inspiration, and came up with this fun project...........
 I had so much fun during my little photo shoot today that I got a bit carried away!  So you have been officially warned that there are lots of photos to come!!
Here she is on our front door, below.
 I started out with a large laser cut wooden frame, found at Hobby Lobby.  I have also spotted similar frames at Michael's. They usually come in all shapes and size.
Actually I purchased most of the supplies for this project from HL.
 I began by painting the frame a pretty purple, called "eggplant".  Once dry, I distressed a bit with fine grit sand paper.  Since I wanted a bit more of a muted color, to feel more "fall-ish", I created a glaze by mixing both black and rust colored acrylic paints, which I watered down a bit.
I then brushed it over the entire frame, quickly wiping off any excess.  The aged effect was just what I was going for!
 This was my first attempt at working with a laser cut frame, and I just loved it!  I can't wait to come up with more ideas using these frames!
They are very affordable, even more so when you use your 40% off coupons!
 I also picked up several fall floral picks, and decided just for fun to paint a few of the pumpkins.  I layered and layered many different colors on them, til I achieved an effect that I was happy with.  I didn't have a set plan, I just played around with various colors.  Don't be afraid to experiment!

 For a fun addition, I decided to make this cute wooden tag.
 I started with an oval shaped balsa wood cut out (purchased in a multi pack at Hobby Lobby).
I painted it this pretty green, called "inchworm".
 Again, I wanted to tone it down, so once dry, I went over it with some of the reserved watered down brown glaze.
 Be sure to wipe off the excess quickly with a paper towel or rag, before it dries.
Instant aging!
 Since I'm not good at hand painting letters (I sure wish I was, and envy those who can!!), I bought some rub on letters.
Happy Fall, Y'All!!!
 Ooop, my pictures are a bit out of order here, sorry!
Here I am painting another pumpkin.
 Using wide wire edged burlap ribbon, as well as narrow contrasting ribbon, cut both several inches longer than your frame.
Glue to the back side, using a hot glue gun.
Note that my narrow ribbon is nice and glittery!  You know my obsession with glitter!!
 I used a combination of floral wire and hot glue to attach the floral picks.
 I made a cute little bow with the narrow ribbon, and secured it with wire, then hot glued into place.
Oh, I almost forgot the "W" (our last name begins with a W)!  
I picked it up in the unfinished wood dept. at Hobby Lobby, and painted it black, then distressed a bit around the edges.  Just use some hot glue to attach to your ribbon.
Then hot glue the wooden tag into place.  Add some of the narrow ribbon to the top to hang, and.............

 Viola!!!
Ok, I am not being paid by Hobby Lobby (but it sure would be nice if they took notice!!!),
but thought I would mention this neat suction cup wreath holder that I picked up there this week.  I was a bit apprehensive if it would work or not.  But, since it's not only made in the USA, and a bargain at 40% off the already low price of $2.99, I thought it was worth a try!
So far, it works like a charm!

 My wreath had fun during her modeling shoot on my faux stone patio!

 It was such a fun project, and I love the rich fall colors. Definitely a change from my usual creams, whites, and pastels! 
 Hope this inspires you to create your own wreath!
 Be sure to let me know if you do!

Tuesday, September 15, 2015

Cast Your Vote!

Bonjour Mes Amis!
Awhile back, I shared with you a project that I completed for DecoArt.
It was a "mystery box" challenge, which meant those of us participating received the exact same supplies, but it was totally up to us what to create with them!
If you caught that post, you will remember this, my tray..........................
 That all began with this..................
 Well, what I didn't mention is that DecoArt is having a contest among those of us who participated in their challenge.
 There were 9 of us in total, and one lucky winner will receive a $150 gift card for DecoArt products!
So, if you would care to vote for your favorite 
(not saying that you have to vote for me, but boy, would I ever appreciate it if you did!!!!!)
you can cast your vote Here!
Voting will begin today, and end September 30th.
Stay tuned, I'll be sure to keep you posted who the lucky winner is!
Thank you!!!


Saturday, September 12, 2015

Letter Holder Redo

Bonjour, Mes Amis!
How is your day going?
Today I wanted to share with you my latest creation for my Etsy shop.  Of course in my excitement, I forgot to take a "before" shot!
Just imagine a boring, plain brown mail sorter. 
The kind you wouldn't give a second glance.
Well, once I spotted her, I just knew that she deserved better.............
 I knew right off the bat that I wanted to paint her my favorite shade of creamy white
(big surprise, I know!).
After a bit of distressing, I then decoupaged vintage sheet music to the front of each pocket.
Since I was going for a shabby chic look, what would be more appropriate than roses?
So I headed on over to the Graphics Fairy, and found these lovelies.
Cutting them out by hand was a bit of work, but fun, too!
 I decoupaged a different design to each front, as well as a pretty rose to the very top.
 Again, I sure wish that I hadn't neglected to take a before shot.  She was none too lovely!!
 I think she is so much happier with her makeover.
Just look at those curves:)
 Thanks for stopping by!
Remember, all it takes is a little imagination, and maybe a bit of paint and Mod Podge, to
give something an entirely new look!


Monday, September 7, 2015

Petite Pink Pumpkin Topiary

Hi everyone, Happy Labor Day!
It's hard to believe we are already going into the second week of September, isn't it?
While the calendar may say that fall is just around the corner, it is still very hot and humid in our neck of the woods.
Today I wanted to share with you my latest creation, which I just completed for DecoArt.
They had requested a Halloween themed project, and it was totally up to me what to create.
I just love projects like that, where the sky (and my imagination) is the limit!
So, after a bit of thought, I came up with a  pink pumpkin topiary with a shabby chic twist!
 It all started with faux orange pumpkins from Hobby Lobby. 

Since I am not into the traditional fall colors (no orange here!), I just couldn't resist painting them pink!
It's a bit hard to tell in the photos, but the largest pumpkin is a bit darker shade of pink, and the middle and top pumpkins are lighter shades.
After painting, I then decoupaged the pumpkins with these pretty floral designs, which I found on Pinterest.
I cut them all out by hand, which was a bit tedious.
 I felt that the pumpkins needed a bit more, so I decided to add some fun polka dots in a creamy white.
A pencil eraser, dipped in DecoArt craft paint, makes perfect polka dots!
Once dry, I coated the entire surface of each pumpkin with DecoArt's decoupage medium, then liberally dusted them with clear iridescent glitter.
('cause a girl just needs a little bling every now and then!)
Here is a close up, below.  I stacked them in this cute little metal urn, also from Hobby Lobby.
It has the sweetest scalloped rim.
It started out a dark gray, which didn't really go with the look I was after, so of course I just had to paint it creamy white!
Before nestling the pumpkins inside the urn, I added a bit of Spanish moss, and a few snippets of shredded and curled vintage sheet music, just for fun. 
For my little photo shoot, I created this cute "boo" sign, which I made on
PicMonkey, and stuck in a pretty thrift store frame that I painted.
 Boo!
 So there you have it....................
 My pink, glittery, petite pumpkin topiary!
 Hope this inspires you to create something just for fun!

Sunday, August 23, 2015

French Stenciled Crate

Bonjour Mes Amis!
Hope you all had a great weekend.
It's been so nice getting back to work creating in my craft room, after such a crazy summer. Boy, did I ever miss it!
So today I thought I'd share with you one of my latest creations, that I made for my Etsy shop.
You know how I love all things French. And aqua is one of my favorite colors.
Well, combine the two, along with some stenciling, and what do you get?
 Viola!  A fun and Frenchy aqua crate!
To the front I hand stenciled one of my favorite designs.
"L'Auberge" means inn or lodge.
 I added the number 4 to each side, representing the street address.

I used my favorite shade of aqua chalk paint by DecoArt.
So cheerful, I think!

 My grandma's antique treadle sewing machine made for the perfect backdrop for my photo shoot!
Thanks so much for stopping by!
Have a great week!

Sunday, August 16, 2015

Turning a Small Wood Crate into a Cute Petite Serving Tray

Hi everyone!
Today I wanted to share with you one of my latest creations, a project that I completed for DecoArt.
As a designer for DecoArt, they submitted a challenge for those of us who wanted to participate.
The challenge was a "mystery box". Everyone would receive the same exact supplies,
but it was totally up to us to decide what to do with them!  It was a "mystery", as we had no idea just what they would be sending us!
Of course I find it hard to turn down DecoArt projects;
(disclosure:  I do receive compensation and products for participating.  The opinions I share are totally my own.)
The opportunity to create and do what I love is just too irresistible!
But, I was afraid that maybe I had bitten off more than I could chew, with our upcoming move.  Well, the project ended up turning into a blessing in disguise, what with our moving fiasco.
Not only did it help take my mind off from things, but I had fun in the process!
I will show you a peek of the finished piece, then share with you what items I had to work with!
I guess you could say my theme was
cute, cottagey and colorful!
 Ok, so here is what was in the mystery box............
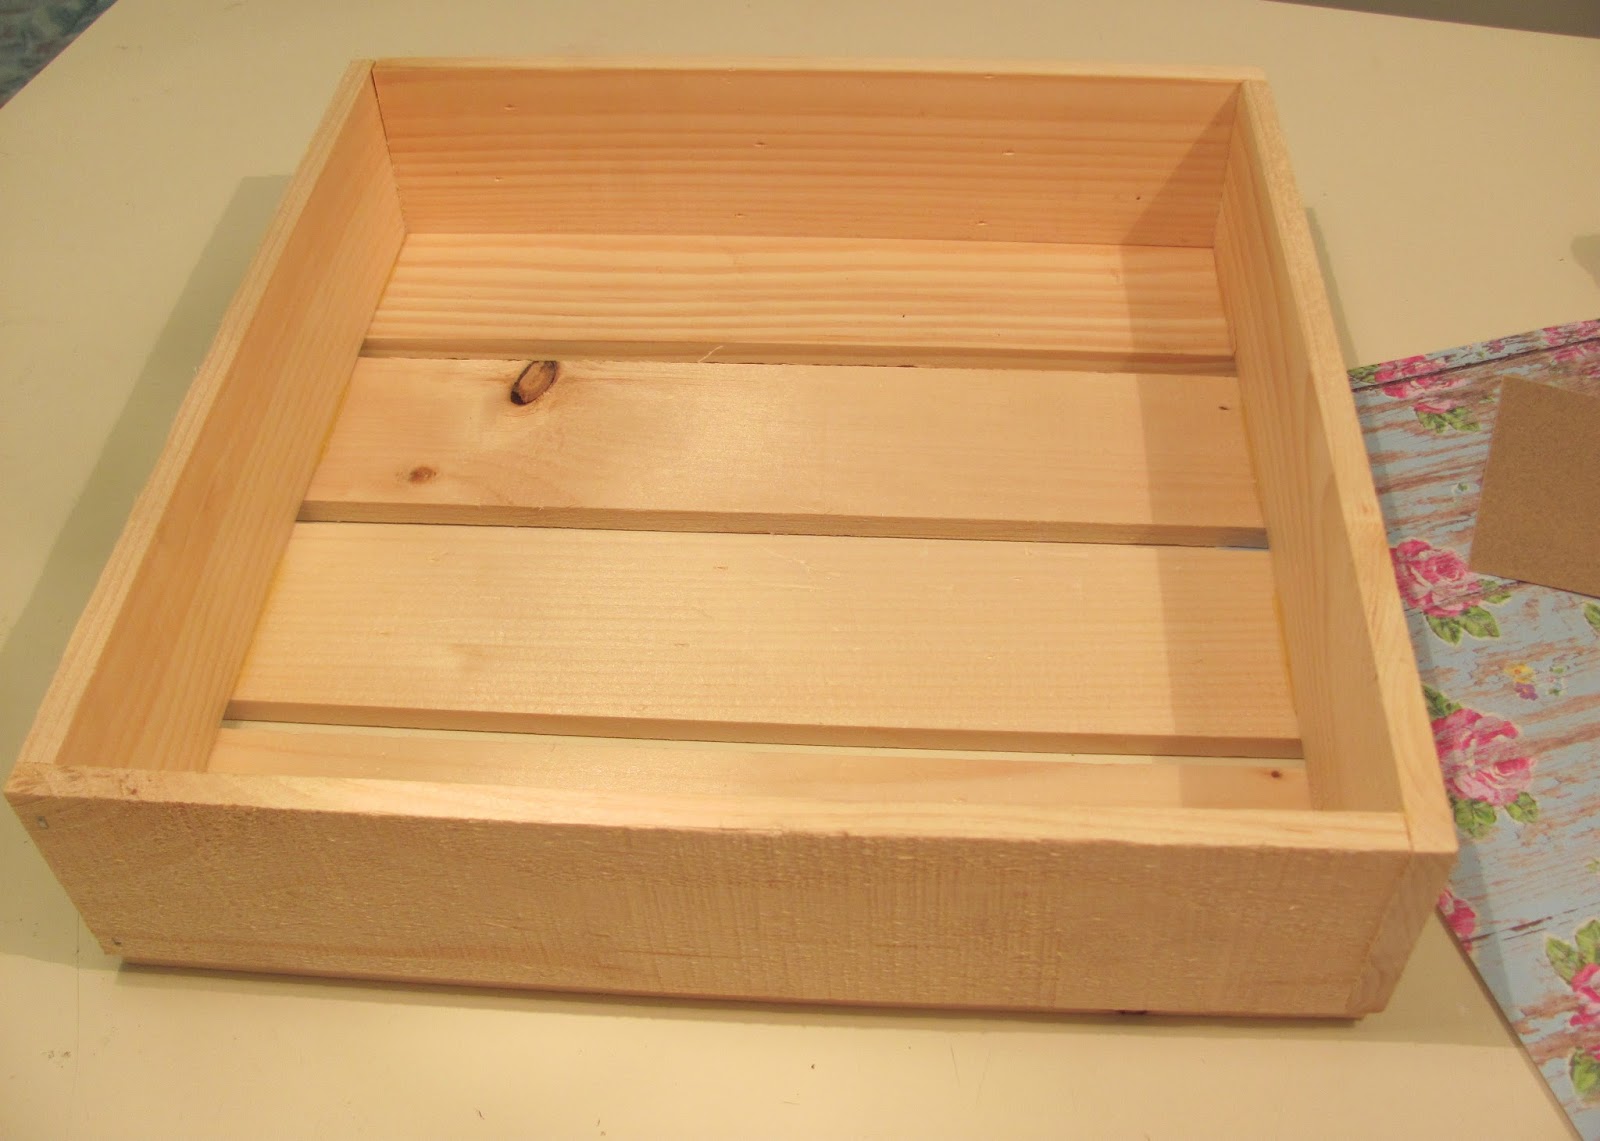
 This small shadow box like wooden crate, and the acrylic paint that you see below, as well as decoupage medium.
It was totally up to us what to create, we were given free reign, we just had to use all of the supplies in the box.  Now those are the kinds of projects that I love!
We could use additional items or supplies.
 When I am waiting for inspiration to strike,what works for me is to just look at an item or supplies for a little while, and usually an idea will come.  The first thought was a cute little serving tray!
I just love trays, and have created many over the years, so I could hardly wait to begin.
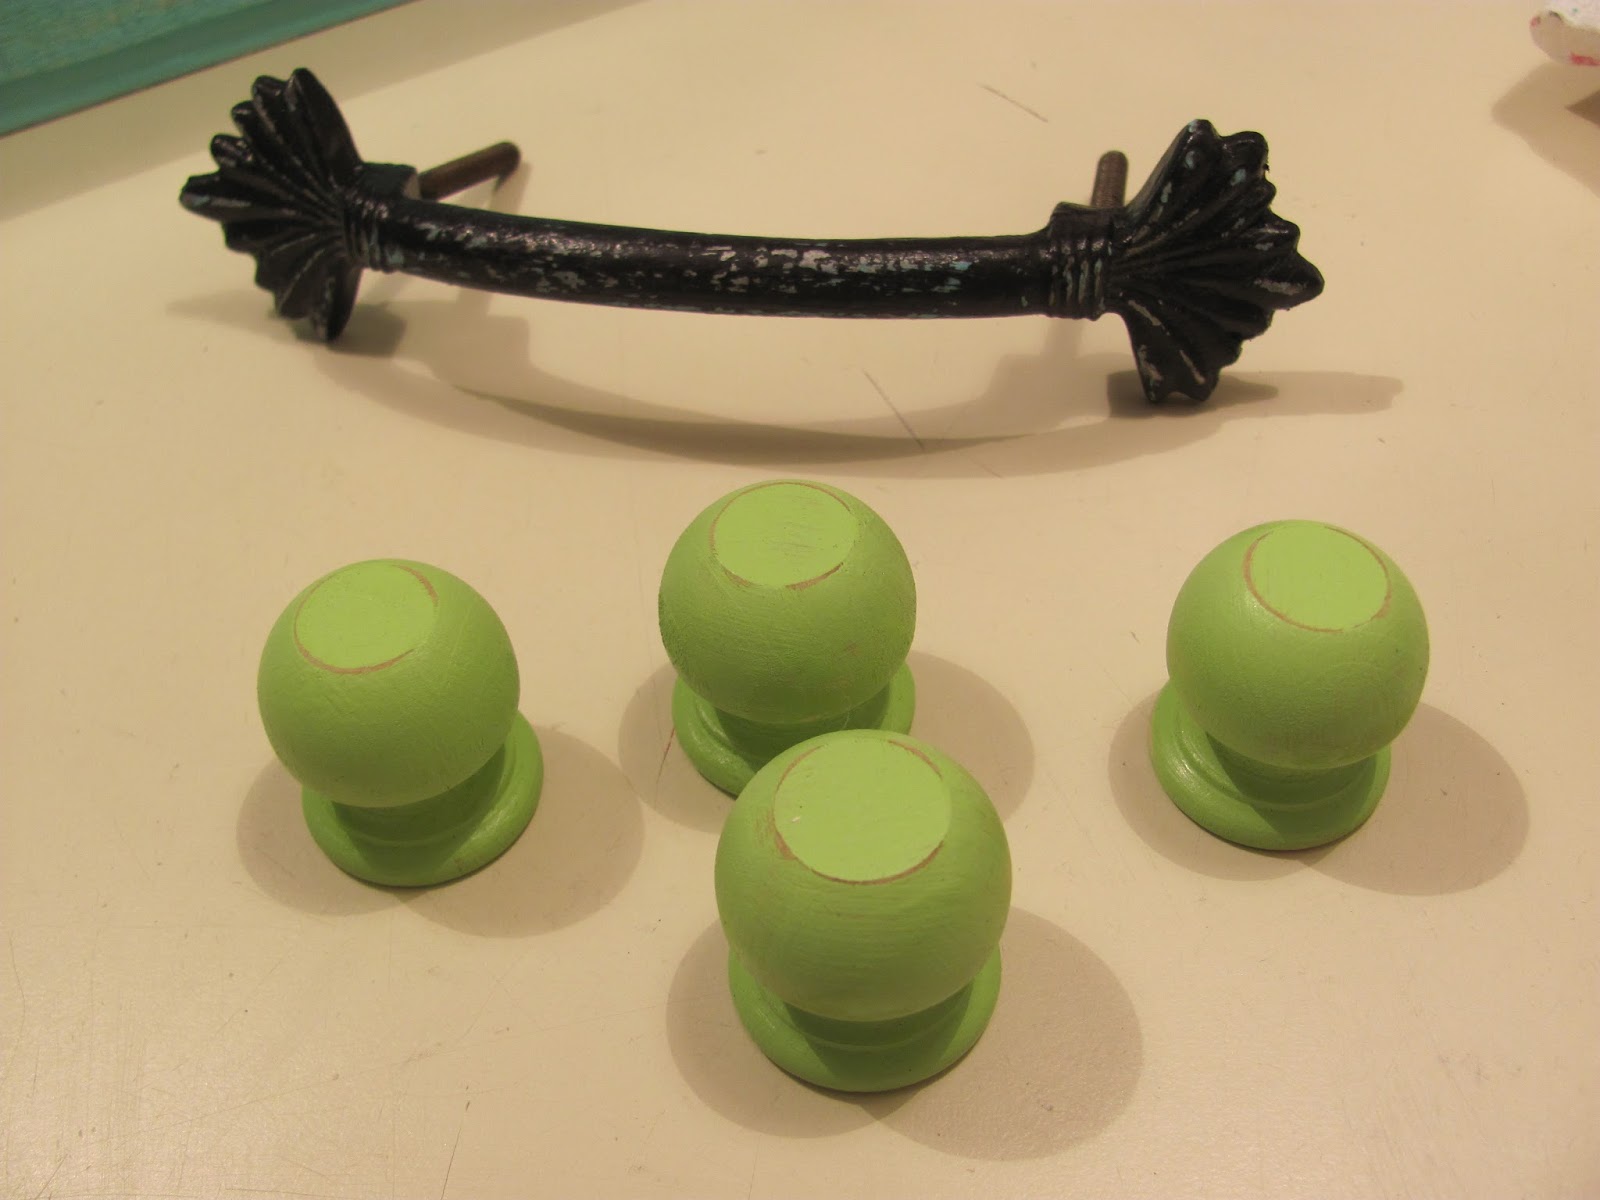
So, off to the craft store I went, and came home with this pretty pair of iron drawer pulls, some small wooden dowel finial covers (that would become "feet" for the tray), pretty scrapbooking paper......
 and piece of clear glass, which I had cut at my local lumber yard.
 I really wanted to keep the handles their original color of aqua (love aqua!!), but decided to paint them black and distress to show a bit of the aqua below.
I then painted the cute little feet this bright and cheery green.
 I was more than happy to see they included this beautiful shade of aquamarine in the box,so I painted the underside and outside of the box in that.
 Since the pink paint in the mystery box was much brighter of a look than I was going for, I mixed it with the white paint, til I achieved this pretty light pink.

 Then after a bit of distressing around the edges, I began the fun part: decoupaging!
 I found the neatest scrapbooking paper that looks like a distressed barnwood with gorgeous roses, in pinks and aquas.  Perfect!
I cut the strips just a bit narrower than each slat, to fit the inside bottom, and around the outer sides as well.

 I loved mixing the patterns for a coordinating but not "matchy-matchy" look!
 Then I glued the cute little feet to the bottom at each corner.
 I placed the glass inside, added the handles (handy hubby drilled the holes for me), and, viola!!
 A cute, cottagey colorful petite serving tray!
 I think the tray also would be cute in a bathroom to attractively store pretty bottles of lotion, shower gel, etc.
 Or it could be used on a dresser in a bedroom to corral jewelry, photos, and display mementos.
I hope my tray project has helped you to see outside of the mystery box!
Thanks so much for your visit, have a great week!


Monday, August 10, 2015

When All Else Fails, Just Add Glitter!

Hi everyone,
I hope you all are having a great summer.  I sure didn't intend to take such a long break. But I am sure you can relate when I say that sometimes life gets in the way of blogging!
When I last wrote, I shared how we had found a home in North Carolina, and we had sold our home here in Michigan.
Well, life sure has a way of throwing us curve balls sometimes.
Less than 4 hours before we were to close on our home here, our realtor called and said that our buyers were backing out!
What the heck???
I thought for sure that this must be his idea of crazy realtor humor, 'til he informed me that he was totally serious.
Unreal!  We had been under contract with these people for 2 1/2 months, and they backed out at the very last minute?
To say that we were shocked was putting it mildly.
I honestly don't understand how anyone could do this to others!!
I was a strange combination of relieved, but yet disappointed at the same time.
We had been packing.  The movers were all set to come.
We were going to be moving into the new home 10 days later.
We had sold a ton of our stuff.
So now, we are back to square one, with our house back on the market, and not sure of what the future holds.
Boy, I sure am more than ready to get off from this roller coaster ride of the last 4 plus months!!!
So, I took a much needed break from all of the stress and broke out the glitter!
It seems like forever since I've been able to take the time to play with some of my favorite materials such as cute graphics, glitter glue, and crinkly seam binding.
 I had so much fun creating these tags.  I found all of the images on Pinterest.  Aren't these little birdies just the sweetest?
I thought the ones below were pretty neat too with their French accent.  Of course I just had to add tiny rhinestones to their crowns for some added bling!
 I always like to tuck a little surprise in with my Etsy orders, which is what I'll be doing with many of these tags here.
Some of them I mounted on extra heavy chipboard.
Others were just mounted on a backing of scrapbook paper.
 I used my favorite glitter glues for some sparkly fun.
I was feeling better already!
 Boy, buying and selling a home sure isn't nearly as easy (or fun!) as they make it look on HGTV!  Let me tell you, it is not for the faint of heart!
So, while not knowing what the future holds is driving me beyond crazy, I will just have to remember my old saying..............
"Glitter makes everything better!"
In the mean time, I look forward to getting all caught up with you.  I have SO missed you all!
Have a great week:)