Welcome to my blog!

Thanks so much for stopping by! I believe that everyone can have a beautiful home without spending a fortune! One of my favorite things to do is find creative ways to re-purpose things I already have on hand, or have picked up at yard sales and thrift stores. Join me as I share with you some of my favorite ideas for crafting and decorating, as well as travel adventures, and fun things that I pick up on my treasure hunts! Much of my work is influenced by my love all things French, nature, and of course shabby chic! I have gotten so many creative ideas from you very talented bloggers out there, and I hope that I can be an inspiration to you as well!
Showing posts with label decoupage. Show all posts

Monday, January 11, 2016

Projects

Bonjour Mes Amis!
How is your week going so far?
Wow, it sure is hard to believe we are already into the second week of January, isn't it?!
Today I thought I'd share with you a few projects that I recently completed.
All are in my Etsy shop, if you care to take a look!
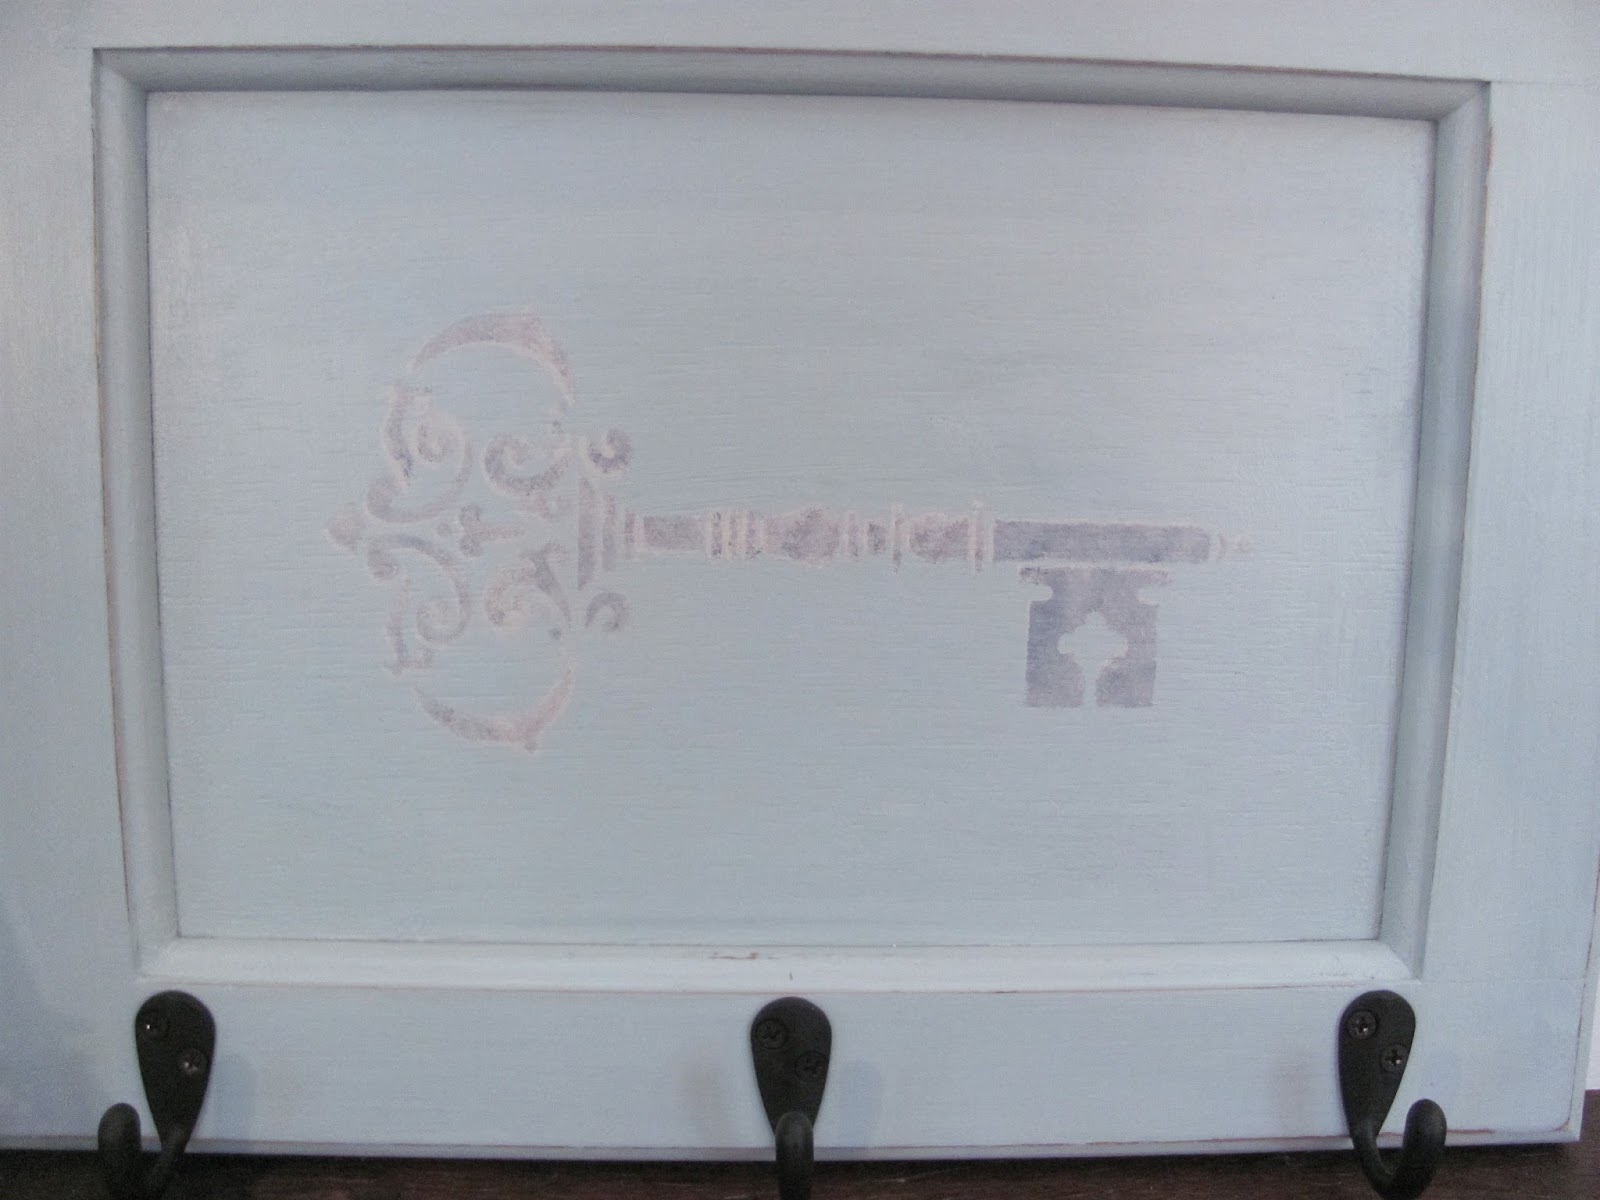
My sister has been busy cleaning out her attic, and found this cabinet door that she thought I could do something with.  Of course, I forgot to take before shots of everything I'm showing you today, darn!
Anyway, it wasn't vintage or anything, otherwise I would probably have kept its original paint and patina.
It was boring golden oak, and so ready for a fresh look and new lease on life!
Immediately I thought of creating a coat hook out of it.
So, I painted it in my favorite shade of light blue chalk paint.
 I then stenciled this gorgeous large skeleton key to the front.  (I wish it would show up better in the photos!)
I used several different colors for my stencil, to give it a dimensional look.
 One of the best things about this project was I had everything for it, except the hooks!
I found those at the hardware store and had my handy hubby mount them for me.
It was a fun project, and I am happy with the end result!
(so, my sister can pass along more "junk" from her attic to me any day!!)
 Next up is this large vintage wooden cigar box that I found while out thrifting.
I see plenty of cigar boxes on my hunts, but I've never come across one this large before!
It was very well made, and had a neat brass latch and hinges, so I just knew that I could do something with it!
 So, I painted it inside and out with a pretty creamy taupe chalk paint.  I left the inside lid unpainted, to show off the original cigar ad (wow, only 5 cents each, this box must be old!!).
I also knew that I wanted to decoupage something to the lid. After some thought I decided on these beautiful roses, compliments of The Graphics Fairy.
If you ever decoupage, you know how tedious it can be to cut out details by hand, but the results are worth it, I think!

 Just for fun, I added the address of a Parisian flower market to the sides.

 I just love finding boxes that I can transform with paint and a little tlc.
The one below was also a thrifted find.  It was a dark reddish brown when I found it, and I could hardly wait to paint it the same pretty light blue as my coat hook project.
The neat thing about this box is that it also holds a photo.  I placed a scrap of pretty floral paper beneath the glass insert for the time being. The lid has a metal insert, and features a beautiful floral cut out design.  
 Of course, I distress nearly all of my projects, to give them what I like to call
"that aged over time look".


I almost forgot to show you my knife, fork and spoon trays.
A few weeks ago, hubby came home with a set of three vintage wood trays.
I just love it when he comes home with goodies for me from the thrift store!
(he knows just what to look for!)
Anyway, they were a dark wood finish, and on their backsides was imprinted
"Toastmaster Hospitality Tray".
They were made right here in Michigan (Grand Haven), back in the 1950's.
 While I don't always know right away just how I will make something over,
if I look at the object long enough, inspiration will eventually strike!
So, since there were three trays, I thought it would be fun to decoupage them with these gorgeous copies of a giant knife, fork and spoon.  All were found on The Graphics Fairy.
First I painted the trays in the same creamy taupe that I used for the cigar box.

I had so much fun with this project!
 It's amazing how realistic and dimensional the silverware looks!


And I couldn't resist sharing a pic of Katie, perched on the wicker bench at the foot off our bed.
I had to laugh, as it looks like she's yawning from boredom over all my craft projects:)

Have a great week, can'w wait to see what you all have been up to!

Wednesday, November 18, 2015

Faux Mercury Glass Ornament Project

Hi everyone!
Today I wanted to share with you my latest project which I just completed for DecoArt, faux mercury glass Christmas ornaments.  I know, it's not even Thanksgiving yet!  But for those of us who craft and create, we need to get a jump start on the season, right?!
So, here is what I came up with............
 Do love mercury glass as much as I do?
I just adore it and can't seem to get enough of it!
So, I decided to create these using plain ol' clear plastic ornaments!
Yep, I used plastic!   While I would rather have glass ornaments, I didn't want to worry about breakage if I were to ship these. So after much debate, I went with the plastic (you can easily find them at Hobby Lobby or Michael's).
For my project, I wanted to make a coordinating storage box.  Something that would not only be a convenient place to store the ornaments after the holidays, but would be a pretty addition to Christmas decor.
 I decided on a French theme, all dusted with plenty of glitter!
(still holding Paris close to my thoughts and prayers.)

I sat up my little faux tree in our sunroom for the photo shoot. 
Making the ornaments was a bit of a process. But thru trial and error, and more than a bit of lack of patience, (I might have tossed out a few 4 letter words, gasp!), I finally got the look I was going for!
 First, you spray a fine mist of water into the insides of each ornament.
 Squirt in a bit of metallic silver paint...............
 Sprinkle in a generous amount of fine silver glitter (I know, you are shocked by that, right?!)
Then swirl it around in the ball.

 Place them upside down in disposable cups overnight.
If you are like me, you can't stand the thought of wasting anything!
Don't worry, you can reuse the excess paint for another project if you wish!
I was really liking the look so far.
But, the next day, not so much!
 More of the paint drained out than I had expected, and I just wasn't happy with how things were looking.
 So, a bit of brainstorming, and I decided to swirl in some more silver paint, along with just a few squirts of black to give more depth and again.
 Ahhh, just what I was going for!
I repeated the steps a few times, letting the excess paint drain out overnight.
It took quite awhile for the paint to totally dry inside.
 Then I could begin decoupaging them!
I found my images on Pinterest, as well as the Graphic's Fairy.
Those pretty butterflies are from the premium membership that I bought from the Graphic's Fairy (love!!).
 And surprise, more glitter was added!
 I tied narrow silver ribbon to the caps, and must say I am really happy with the end result!
Finally!!

 Who would guess that these are just plastic?
This sweet little angel, above it one of my very favorites!


 I bought a large paper mache box, which I painted with chalky finish paint.
Then I decoupaged the sides and lid with my French graphics, and dusted with more glitter.
Pretty creamy cotton lace trim was added to the lid as a final touch.
Here is one more look..........
Hope this enspires you to create something fun and glittery!

Wednesday, November 11, 2015

Fun Glittered Tag Project


Bonjour Mes Amis!
Hope your week has been a great one so far.
For me, any day that involves glitter, vintage images, and decoupage is a great day!
So with that, I thought I'd share with you a few vintage inspired tags that I just created.
I began with some extra thick and heavy chipboard.  Actually it came from vintage picture frames that I picked up while thrifting. Since I didn't need the backings any more, I put them in my crafting stash.  I never throw stuff like that away, as it's just full of crafting potential!

 Then the really fun part began!  I pulled out my stash of lace trims, tiny buttons both vintage and newer, rhinestones, and bits of this and that.
Throw in some Mod Podge, glitter and copies of gorgeous vintage images, and 
viola!!
 I had so much fun creating these tags.  I like to keep them on hand to give as little gifts.
Wouldn't they be pretty hung from a door knob, or added to a wrapped present as a gift within a gift?
And I think they would be gorgeous hanging on the Christmas tree, too! 
I started by decoupaging vintage looking sheet music to the chipboard, which is actually decoupage paper.
The images of the beautiful women are from the Graphics Fairy. Aren't they beautiful?
For the tag below, I added this adorable glittery cut out of a birdcage, that I had in my stash for quite some time.  Love!
 To the bottom of each tag, I hot glued on pretty lacy trim and buttons.

 I then pulled out my vintage Children's dictionary and cut out various definitions, which I mounted on thinner chipboard.  No worries, the book is not valuable or anything!  I bought it for a buck at our libraries used book sale, just for the purpose of crafting.  I never would tear up a valuable book!
 Oh, the women are mounted on chipboard, too.
 I had these fun little keys in my stash, just waiting for the perfect project!
I added thin wire for hangers, leaving it a bit crinkled just for fun.
Then I tied to the wire gorgeous pale pink hand torn silk ribbon.
 Rhinestones add even more bling!

 I had so much fun with this project, I can't wait to create some more!
 The best thing is that I already had everything on hand.
Hope this inspired you to create something with what you already have sitting around!