Hope you all are having a wonderful day! I've been working with vintage French book pages, decoupage, and glitter, which makes it a great day here at the Chateau!
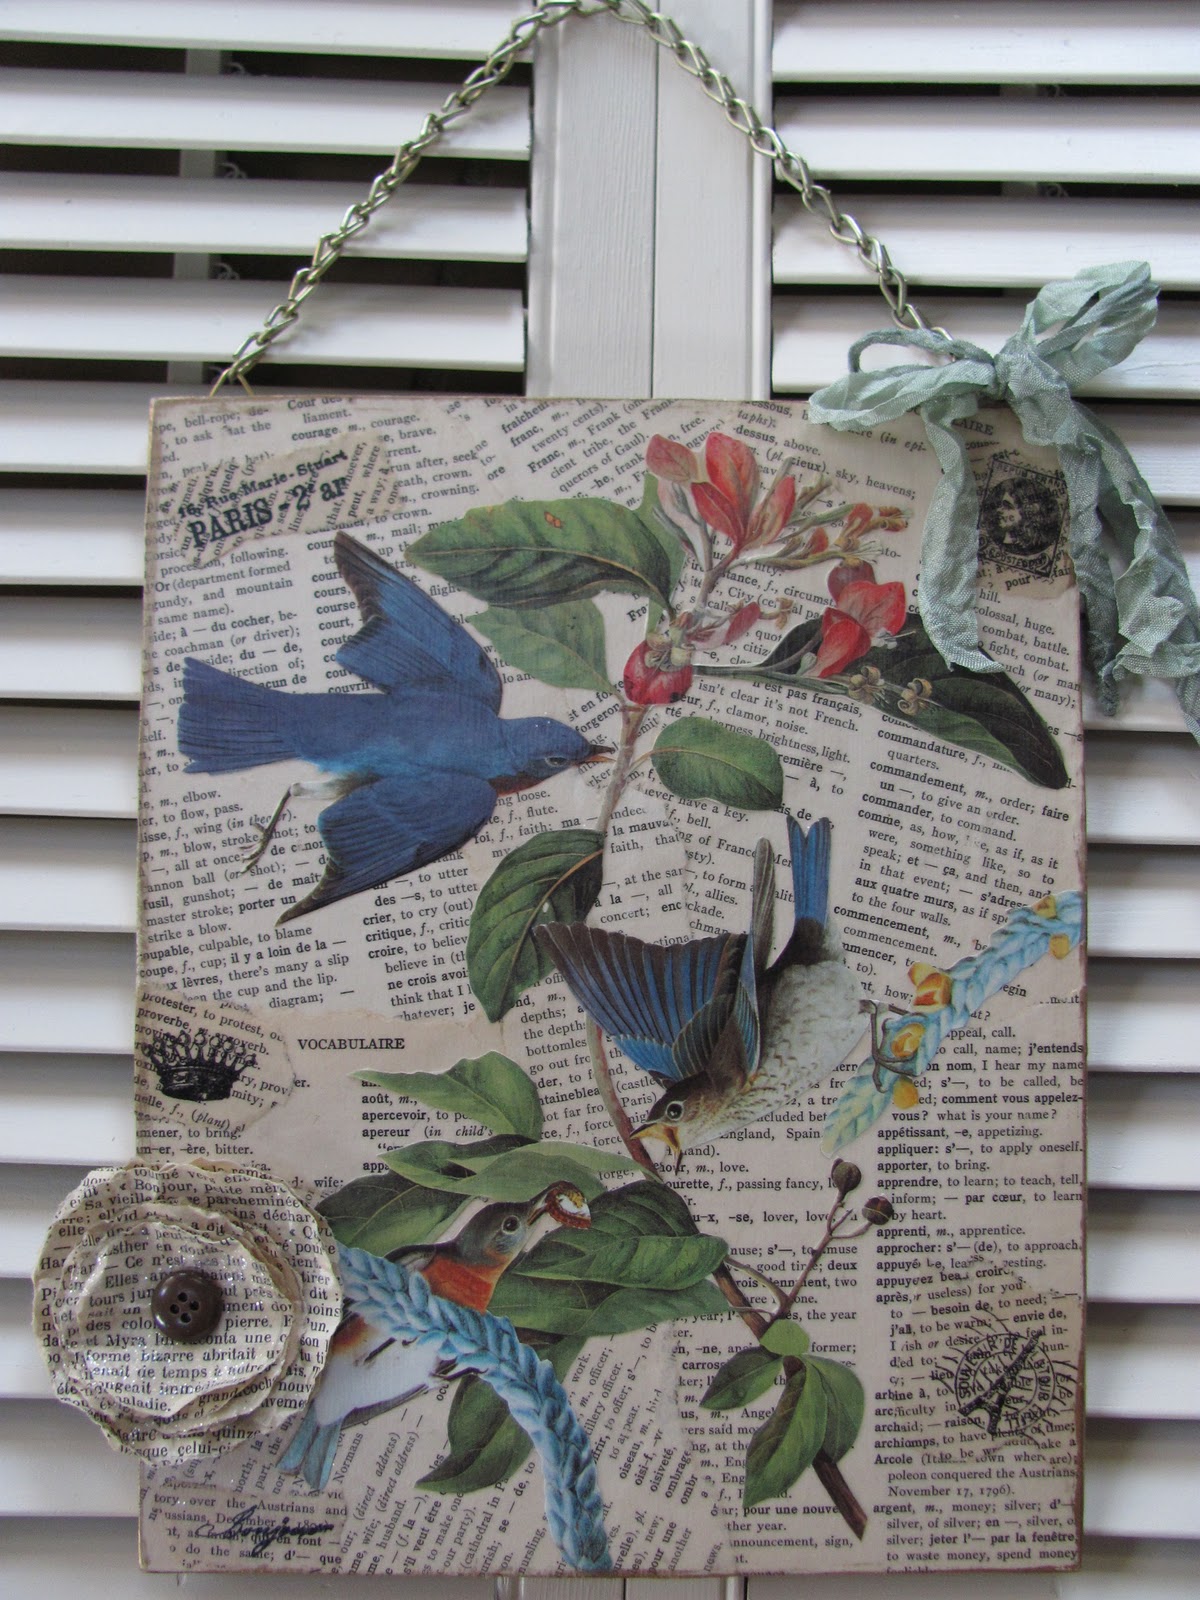
I've been seeing some really pretty flowers here in blog land, made from everything from paper to fabric to coffee filters. I had never attempted making them until my friend Cindy inspired me to make them. Now I just can't stop creating them, it appears that I have a new addiction! So I thought I'd share with you how I make them. If you stopped by yesterday, I showed you the flower that I made to embellish the collage that I made for my
Etsy shop.
So, let's get started!
You won't need to many products for this fun project. In fact, if you are like me, you already have everything on hand! You will need Mod Podge, a foam craft brush, clear glitter, a glue stick, self adhesive dots (or a glue gun), paper, and buttons.
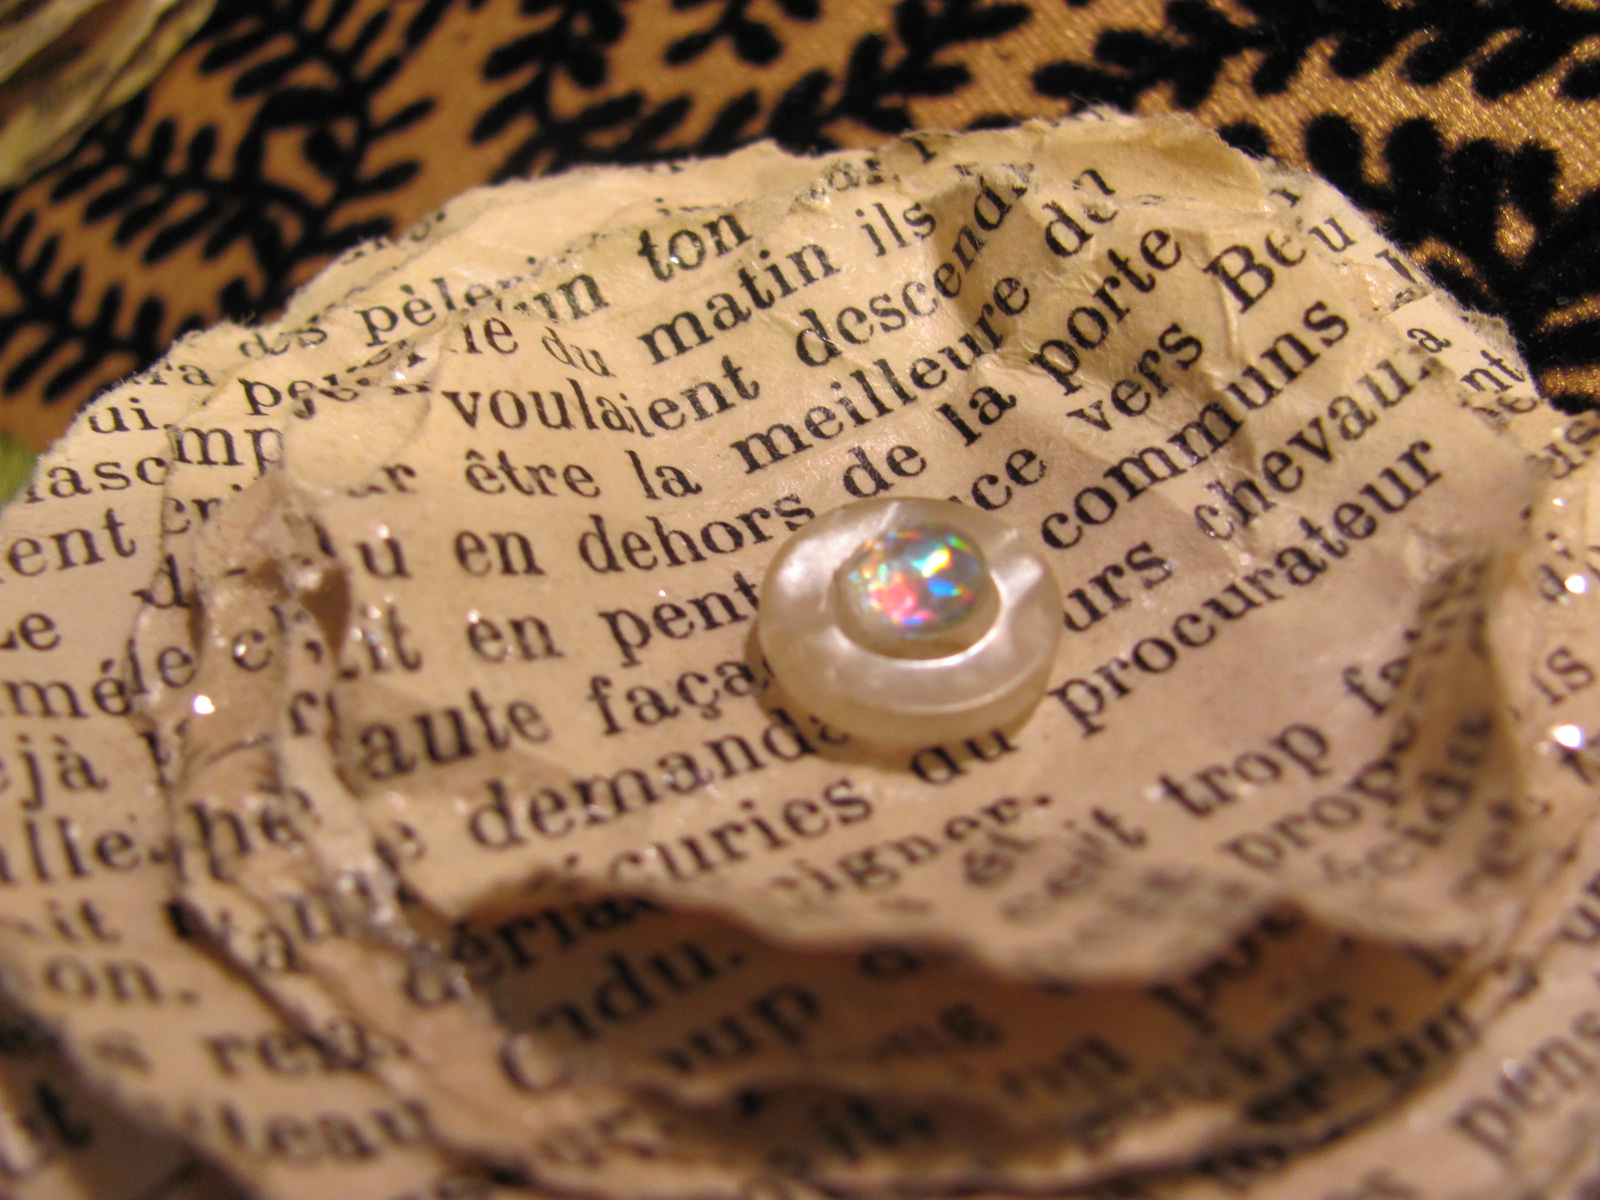
Since you know that I'm crazy about all things French, I used an old French book to make my roses. Of course, you could also use pretty scrapbook paper, or vintage sheet music, or a combination of all of them!
This is the kind of project where there is no right or wrong way of doing things!
You will need to trace circles in three graduated sizes. You can use a glass, mug, or whatever. I just used lids that I had in my craft room.
Tear out your circles (I tear several sheets of paper all stacked up at once to save time). I think a torn edge for this project looks so much prettier than a cut edge. You will need 3 large, 3 medium, and 3 small circles for each rose. I almost forgot to mention that for projects like this, I always put down a large piece of waxed paper on my work surface. Not only will this keep your surface clean, but you can save any excess glitter and pour it back into the container (you know how I hate wasting anything!).
Now, this is the part that almost had me cringing! You see, I am a neatness counts, always color inside the lines kinda girl! At any rate, you will need to crumble up each circle into a little ball.
Ok, I think I can do this!!
Gently uncrumble them, still leaving them very wrinkly.
Lightly brush each circle with some mod podge, then sprinkle with a bit of the clear glitter. The hardest part is having enough patience to let them dry before proceeding any further!
Once they are finally dry, just use your glue stick (just a dab in the center of each circle will do) to adhere the 3 large circles, followed by the 3 medium, then the three small. For the centers, I added buttons with the glue dots. Or you could just use a hot glue gun for this step if you wanted to.
It's really hard to see the glitter in these shots, but it's there!
You could make your roses any size you wish, or course, or add as many layers as you want. They sky is the limit with this project! My flowers are about 3" across.
I thought they looked neat with these pretty green leaves.
For this little petite rose, I added a mother of pearl button and a rhinestone. Oooh, la, la!!
That's it, super fun, super easy, and way too addictive! Hope you try making them, I think you'll love it just like me!!
I am linking up to the following great parties:
Faded Charm
White Wednesday


25 comments:
They are just darling!!! Love the rose and will try the idea soon...thanks for sharing!!!
These are great flowers! The glitter and buttons really enhance the look! Great job!
Love, Karen
Geez - they look so easy to make. I think I could swing that. Very creative.
your roses are just so lovely, I have never tried before....alright, one more thing on my to-do list! My daughter will be excited to work with glitter.
...maybe we should get together ~ or at least our tutorials LOL!!
Your paper roses and my paper pumpkin!
Happy White Wednesday!!
xo, Rosemary
JUST ADORABLE!!! Thank you for sharing your tut with us!!!
These look simple and fun -a great gift!
So cute! HW!
Simply beautiful! LOVE 'em!!! Thanks for sharing! Now I'm off to make paper roses!!! :)
Happy White Wednesday!
Lori
Donna~ Imagine that! YOU using glitter! BWahahahaha!
Those are just darling! Thanks for the tutorial. I am going to earmark this so I can show it to my granddaughters. They will love doing this project and it won't matter if they are a bit rough around the edges for them. I came across the ones made out of coffee filters the other day too. By any chance, do you remember who posted that tutorial on them? I was going to earmark that and forgot~sheez! I know she had a different way of cutting them than I expected.
I have to tell you though, the crumpling part is going to be just gut wrenching for me. I'll let SweetCheeks do that part..she is a great little rumpler-ever notice her clothes? lol
Guess where we were today? Manistique-uh-huh..Did you get to Fayette? I'm sure you probably did..if not you really missed a great place. The campground is a bit rougher there-no showers or flush toilets in the camping area. But the village is wonderful!
Okay-the "native" is getting restless here- Have a great night- Diana
ADORABLE!
m ^..^
I absolutely adore those roses! They are definitely on my to do list now! Thank you so much for the tutorial! One question....where did you find your French books? I've been looking and coming up empty handed.
These are Adorable Donna! Oh my there is so Much you could do with them! Thank you to Cindy and You for Sharing the Technique!
Thank you for your Support and Words of Encouragement. It is Greatly Appreciated! I am Looking Forward to seeing You in Romantic Homes!!!!
Have a Wonderful Evening!
Hugs
Jill
Thanks Donna for Sharing, I have seen so many Beautiful Flowers, but haven't tried My hand at them yet..... Your Tutorial was Wonderful
Stop by if you get a chance & Have a Great Week
Cheryl
WARNING: rosette-making is ADDICTIVE... you will be constantly looking to make rosettes out of ANY and ALL materials that cross your path! Wonderful post! :) mercedes
Very cute, will have to keep a lookout for a french novel, not sure I could cut up something that I could read!LOL
Cool! I will be giving this a try- probably minus the glitter. I have a phobia to it. LOL
Hugs- Tete
Fabulous... simple easier and really effective.. love it...
I think i'd love the crumpling bit.. hehe.. have a great week xxx Julie
Great tutorial.. can't wait to try this!
Love the paper flowers! Thanks for the tutorial, Donna!
~ Jo :)
These are very sweet and look pretty easy to make. I'm wanting to get back into my craft room and create. Just waiting for the time to allow itself.
Enjoy your week.
Kathleen
Trying the second time to post...grrrr
Love your flowers and will be trying my hand at making them soon. Thank you for sharing!
Blessings~
Wonderful job of crumpling that paper up!!! these turned out beautiful. I need to do some of these for some projects.
Saweet!! I know what we'll be doing on our next craft night here at the lakehouse! Can't wait to show the gals!
Thank you Donna.
Debbie@houseatthelake
How pretty...thank you for the tutorial!!
Post a Comment